
While many battle royales on PC have long been the territory of mouse and keyboard players, Apex Legends was released on both PC and console at the same time when it came out in 2019. That meant there was support for mouse, keyboard, and controller inputs from the beginning. It’s also given us lots of time to figure out the best controller settings for the game.
So, here are the best controller settings for Apex Legends.
- Best controller settings for Apex Legends
- Button layout
- Movement and aiming in Apex Legends
- Advanced Look Controls in Apex Legends
- Target Compensation in Apex Legends
- How to choose the best controller settings for Apex Legends
- Best response curve for Apex Legends
- Is it worth switching to a controller on Apex Legends?
Best controller settings for Apex Legends
If you’re thinking of switching or have already changed and are looking for the optimal controller settings, here are some of the best. Some controllers offer bonus features, such as paddles and different controller techniques, like a claw, but we will focus on what works for a standard controller and technique.
Button layout
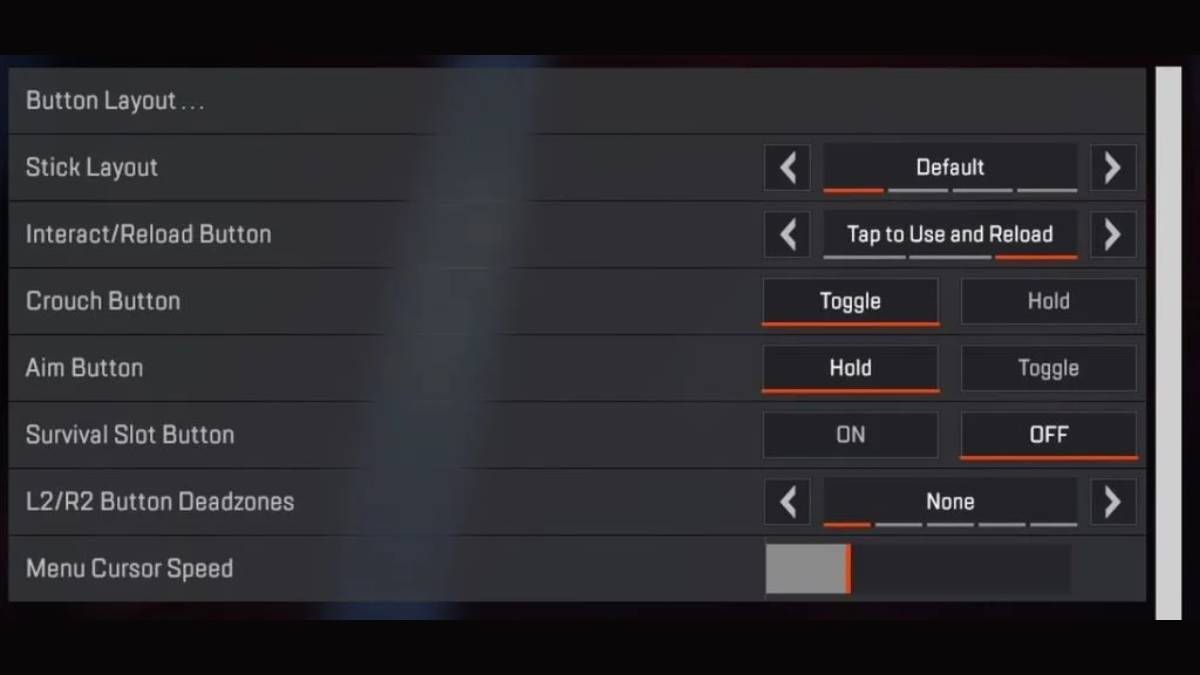
- Stick Layout – Default
- Interact/Reload Button – Tap to Use and Reload
- Crouch Button – Toggle
- Aim Button – Hold
- Survival Slot Button – Off
- L2/R2 Button Deadzones – None
- Menu Cursor Speed – to preference
Bumper Jumper swaps the jump button from the X or A button onto your left bumper, letting you jump without taking your thumb off the right analog stick.
Button Puncher, on the other hand, swaps your crouch button with your melee button, allowing you to crouch spam in close-range fights without losing your aim on the right analog stick. These alternate control schemes might initially feel strange, but they can let you do more while playing.
While it does come down to preference, you might want to consider putting crouch on a toggle. This will allow you to be sure that you aren’t required to take your thumb off the joystick to remain crouched and can look around freely while in the crouched position.
There are several viable button layouts for controller players in Apex. Many players will enjoy the default layout, which translates well to most other shooters. Other options might feel strange to get used to, but they can yield better results once you practice them.
Your aim button should be set to hold. Having this on hold allows you to immediately react to nearby enemies who are outside your ADS view. As for trigger dead zones, you only need to adjust this if you’re having an issue with your controller moving in a certain direction.
Menu cursor speed is another matter of personal preference, but armor swapping is one good reason to turn your cursor speed up a bit. Going into an enemy’s death box and grabbing their armor quickly is much faster than healing and can be vital to fending off a third party that wants to take advantage of your team’s low health. The best controller players can get into a death box and take the armor in a flash, instantly refilling their shield health and preparing them for the next fight far more quickly than using a shield battery.
Movement and aiming in Apex Legends
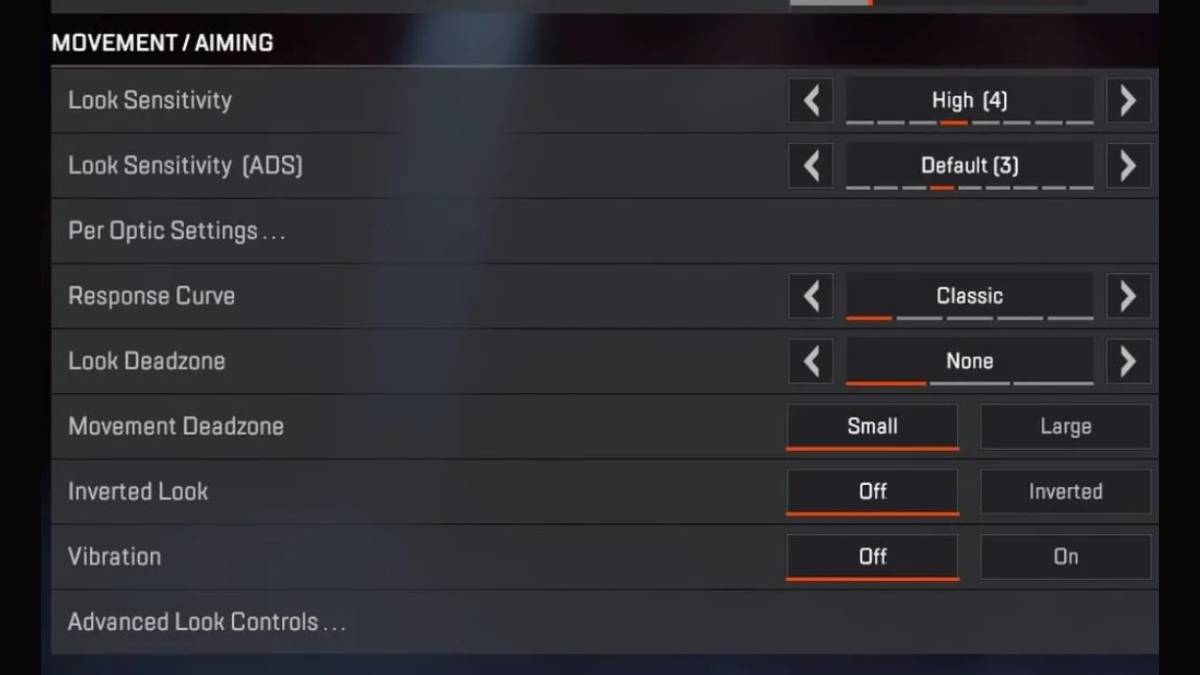
- Look Sensitivity – High (4)
- Look Sensitivity (ADS) – Default (3)
- Response Curve – Classic
- Look Deadzone – None
- Movement Deadzone – Small
- Inverted Look – Off
- Vibration – Off
These settings will only be relevant for those who choose not to use the Advanced Look Controls (ALC) that will be detailed in the next section. Again, this is a matter of personal preference, and regular sensitivity will be the most comfortable setting for many players.
The benefit of utilizing 4-3 sensitivity is letting you look around more quickly when not aiming. This can let controller players swing around in close-range fights more efficiently, making it easier to perform movement techniques like wall bounces. You’ll discover what’s comfortable for your playing style by playing the game. It would be best to try to have your sensitivity at the highest point you can effectively control.
Best Apex Legends controller sensitivity
From experience, it’s generally better to have a higher sensitivity. Getting to a point where your sensitivity is as high as you can control also leads to utilizing your arm rather than your wrist to move the mouse. That being said, getting a higher sensitivity down to a comfortable degree can take time you may not have. In that case, find a comfortable level for you as a player, even if it’s fairly low.
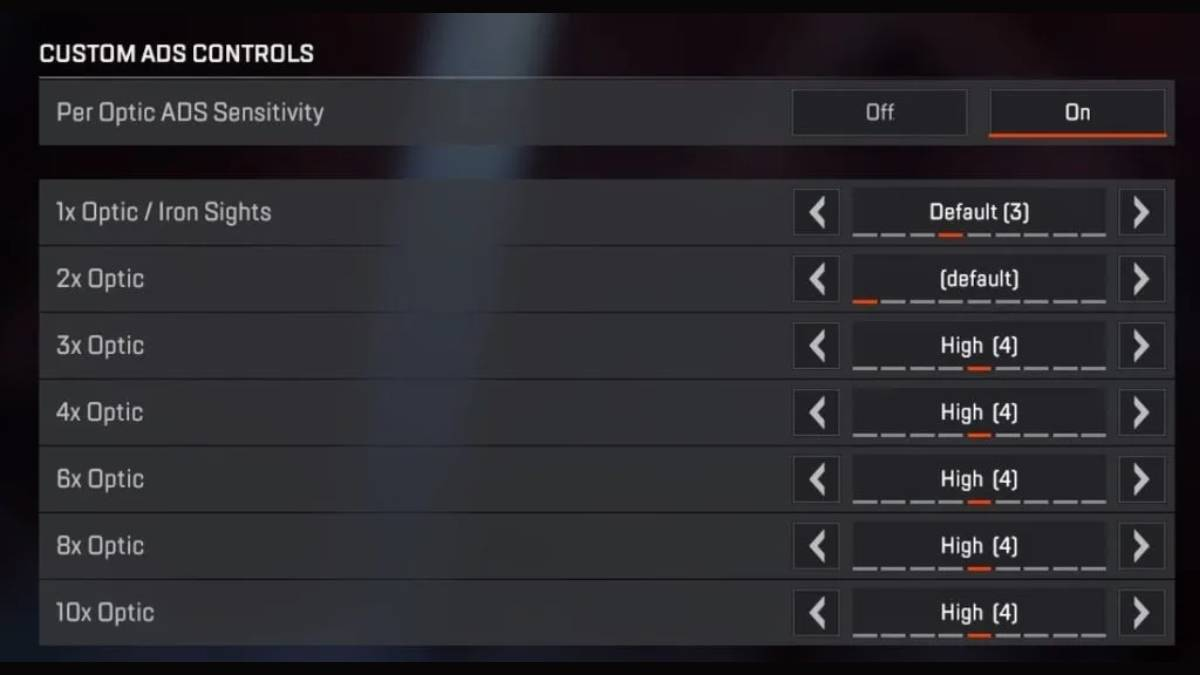
- Per Optic Sensitivity
- 1x Optic/Iron Sights – Default 3
- 2x Optic – Default
- 3x Optic – High (4)
- 4x Optic – High (4)
- 6x Optic – High (4)
- 8x Optic – High (4)
- 10x Optic – High (4)
The response curve setting that’s best to choose is the classic setting. This will dictate the speed at which the game registers the movement of a player’s crosshair in response to the movements of the thumbstick.
You might also want to look at changing your sensitivity per optic magnification. Since your camera will feel like it’s moving slower the higher the magnification is, bumping up the sensitivity a bit for longer sights can make you feel like you have more control with snipers and marksman rifles while maintaining the accuracy of a lower sensitivity on lower magnification sights for close range engagements.
Look movement dead zones should be negligible for most players. For those who want extra fine-tuning, turn the look dead zone completely off. Remember that your right analog stick will respond to even the slightest touch if you do this.
One setting that isn’t a matter of personal preference is controller vibration. While some players might like the immersion of the controller rumble, the vibration will throw off your aim for a competitive game. Just trust us on this one and turn it off.
Advanced Look Controls in Apex Legends
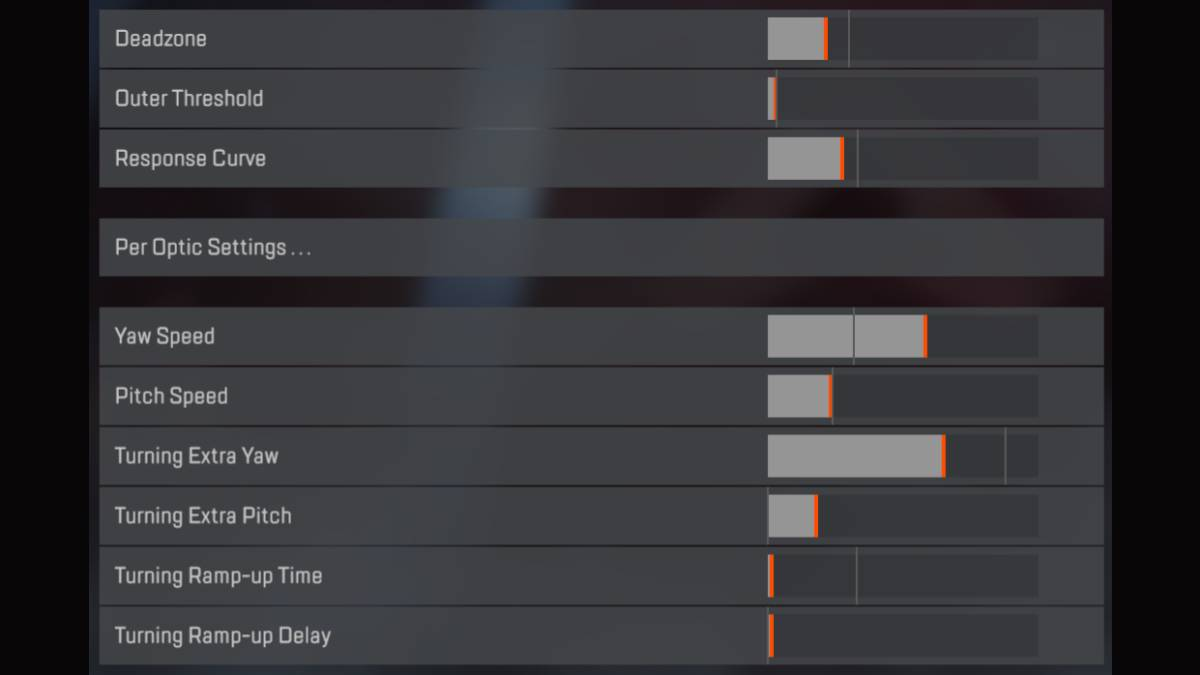
- Deadzone – 15%
- Outer Threshold – 5%
- Yaw Speed – as high as possible
- Pitch Speed – as high as possible
Some players prefer to use ALC over the more general look controls. Here’s an excellent place to start for those looking to try ALC for the first time.
Keeping the dead zone to a minimum will be important since most players won’t be able to control it. Again, finding what’s comfortable for your playing style is most important, but an excellent place to start is around 15%. This rule also applies to the outer threshold and response curve. You’ll want to have the outer threshold tuned right down to about five percent of the bar.
The two most essential parts of ALC are the yaw speed and pitch speed. The yaw speed dictates how fast you turn to the left or right when you aren’t aiming down sight. Again, find what’s comfortable for you, but you’ll want to have it as high as possible.
Pitch speed is the opposite. This is the speed at which a player will look up and down when not aiming down sight. You’ll want this around the middle since you don’t need to flick toward the sky too often.
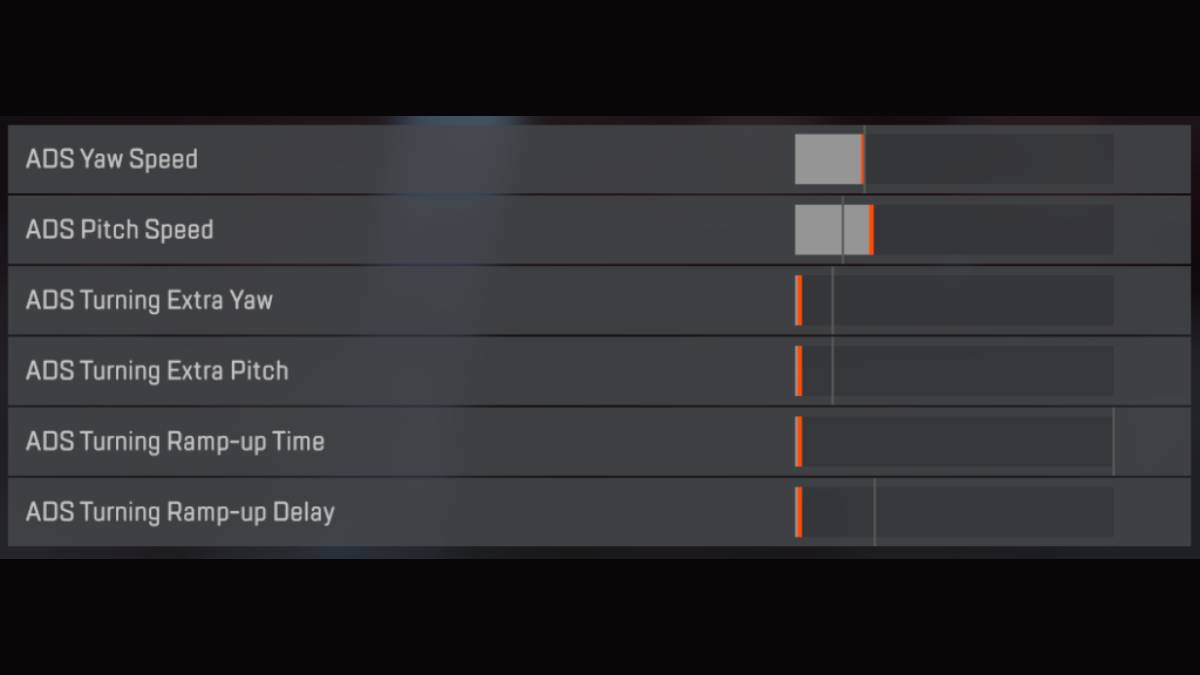
- ADS Yaw Speed – 25%
- ADS Pitch Speed – 25%-28%
- ADS Turning Extra Yaw – 0%
- ADS Turning Extra Pitch – 0%
- ADS Turning Ramp-up Time – 0%
- ADS Turning Ramp-up Delay – 0%
The following two sliders, turning extra yaw and turning extra pitch, will be set very similarly to those mentioned above. ADS yaw speed will be drastically different from the yaw speed mentioned before. While aiming down sight, you aren’t going to want to turn too much, so look to keep it below 25 percent of the slider. ADS pitch speed is another setting you won’t want too high. Otherwise, it won’t be controllable.
Keep it around the same as the ADS yaw speed or maybe slightly higher. The remaining settings in ALC can all be slid completely off since they aren’t going to be important unless you need to suit a specific style of play.
Target Compensation in Apex Legends
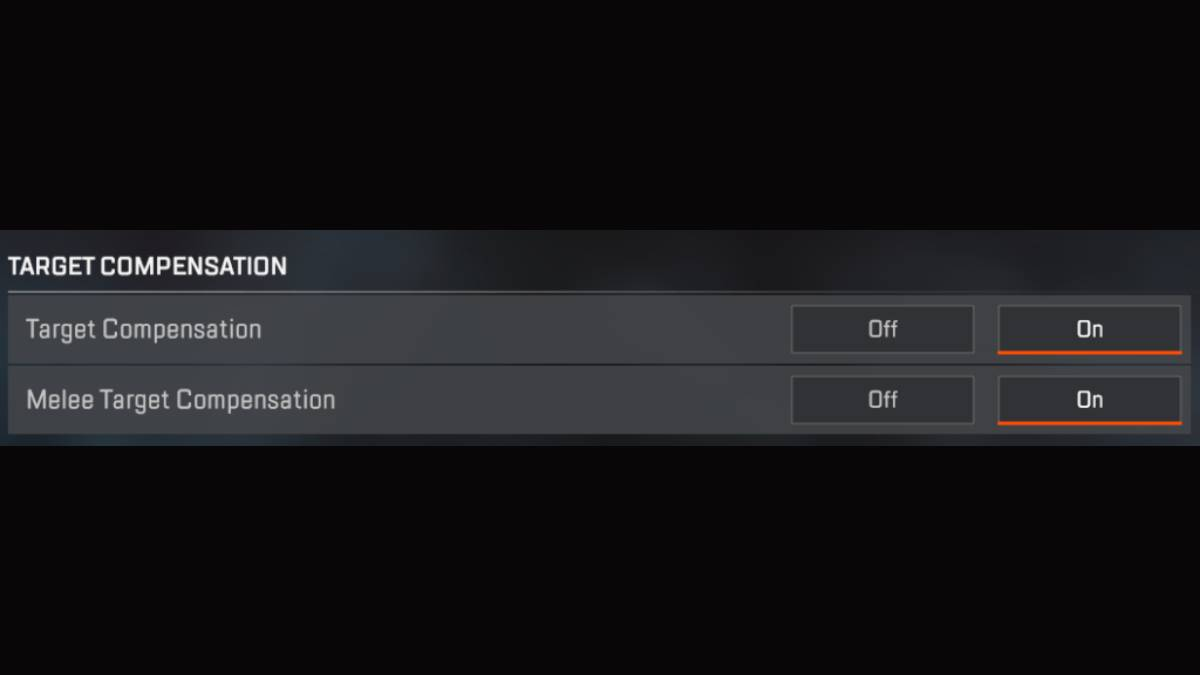
- Target Compensation – On
- Melee Target Compensation – On
No matter what platform you play on, you’ll want both target compensation settings turned to “On.” If you’re playing on PC, mouse and keyboard players won’t have aim assist, but the MnK input allows players to be more exact with their aim, and turning off your aim assist will put you at a severe disadvantage. If you’re on console, everyone else will also have aim assist, making the disadvantage even more significant.
While there are variations of these settings made to assist different levels of players with varying styles of gameplay, these are the simplest and most effective changes that can be made to help with your improvement in the game.
How to choose the best controller settings for Apex Legends

For many settings and sensitivities, the setting you’re comfortable with will ultimately be “the best.” There’s no guarantee that any combination of setting choices will make you better in Apex, and if you like a particular setting more than the one suggested here, stick with it. You’ll probably play better. But some settings can enable you to do more things on a controller, which might help optimize your play.
Best response curve for Apex Legends
The Classic response curve is the best in Apex Legends. Classic evens out quick player acquisition and aiming adjustments. The response curve setting is worth looking into to improve aiming and movement because it alters how your character reacts to your button inputs.
Is it worth switching to a controller on Apex Legends?
As time has passed, controller players have asserted themselves among the best players in the game, revealing its advantages over mouse and keyboard. While players using the more traditional PC input still are kings when it comes to long and some mid-range engagements, as well as the game’s deep movement system, controller players rule close-quarters fighting.
The superior input method, ImperialHal claims it’s “broken.” Albralelie said he “can’t think of a reason” for anyone to stay on mouse and keyboard. Even Shroud has stated that he is surprised the game still has a competitive scene that puts controllers in the same lobby as mouse and keyboard players due to their perceived advantage at close ranges. Based on that, there’s never been a better time to consider switching—if you’re up to the task.
There you have it: the best controller settings for Apex Legends in focus and improvement. We hope this piece ups your game.