
Baldur’s Gate 3 offers players plenty of crucial decisions to make along their journey, one of which involves Yurgir in the Gauntlet of Shar.
Players will travel through the Sanctuary of Shar to infiltrate The Absolute in Moonrise Towers, where numerous puzzles exist to solve, enemies to kill, and gear to loot.
To fully explore the Gauntlet of Shar, you will require orbs—the last of which is by Yurgir, leading to direct interaction with him.
Like many things in Baldur’s Gate 3, however, there are several options ahead of you, where you can either defeat Yurgir or break his contract.
Should you save or kill Yurgir?
Saving Yurgir improves your relationship with Asterion, which is very enticing if you like him as a character. However, that also means having to do a tough boss battle. The choice mainly comes down to how much you like Asterion.
Remember that breaking Yurgir’s contract will not give you the item Infernal Iron. It will also eradicate your relationship with Astarian if you agree to help him find out what the scars on his back mean.
Killing Yurgir seems like the best option because it does not jeopardize your relationship with Astarian, gives you an Infernal Iron to use in Karlach’s companion quest, The Hellion’s Heart, and gives you a pretty sweet one-hand crossbow called Hellfire Hand Crossbow.
Ultimately, I took down Yurgir, as I wanted to please my main vampire boy.
How to kill Yurgir in BG3
To get the final orb needed in the Gauntlet of Shar, you’ll have to interact with Yurgir, and killing him, although challenging, is the quickest way to get what you need—plus it keeps Astarion happy.
Yurgir’s Concussive Blast is a massive problem, particularly for any melee characters, and his horde of followers can quickly drain your health, so be prepared for a lengthy fight that may require reloading a save and trying again.
There are, however, some tips to make this fight easier. Here are a few methods that we’ve compiled.
Throwing bombs with Karlach
One way to deal significant damage is to wait until he spawns bombs across the room, then use a character like Karlach to throw them back, making them explode instantly.
Lure them to ground level
Alternatively, use a familiar or cast ally to lure Yurgir and his followers down to ground level and near the door, where you can control the flow of combat better and protect yourself from attacks by moving outside the doorway.
Counteracting Yurgir’s invisibility
Yurgir’s invisibility can be quite annoying. Here are a few ways to counteract that
- Use AoE attacks from a druid in owlbear form
- Use Volo’s Eye to see invisible enemies
- Use a “See Invisibility” spell, which can be learned from the Divination school, gotten as a scroll, or used as an ability from an item.
- Use the spell “Fairy Fire,” which reveals invisible enemies
Complete a hidden Arcana check to convince him and his allies to kill themselves
This one depends on your class, as Warlocks cannot do it due to a bug. You’ll need a character with high insight and good Charisma. Even if you don’t succeed fully, you can whittle down his companions to leave just the big man himself to face off against.
At the beginning of the dialogue with Yurgir, steer the conversation toward his pact with Raphael and get him to share his contract details. You can then ask Yurgir why he wanted the Dark Justiciars dead, which he says was so that he no longer had an audience.
Passing the first persuasion check, which is 16, he will kill his followers. Another Persuasion check of 21 leads him to kill his pet displacer, and a final Persuasion check of 21 results in Yurgir defeating himself.
There are many ways to get to this skill check, but this dialogue tree is one of the most reliable.
- “Put that thing down. I’m here to talk.”
- “Wait – you know Raphael?”
- “He wants you dead.”
- “Let’s share our experiences about Raphael. Perhaps we can help each other.”
- “Show me this contract. Perhaps there’s something you missed.
Once you’ve been through that, an insight check will pop up, which you need to pass to unlock the second stage of dialogue checks.
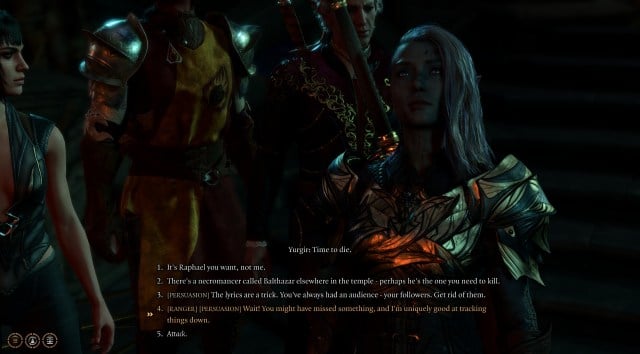
- “Your contract is a song?”
- [PERSUSASION] The lyrics are a trick. You’ve always had an audience – your followers. Get rid of them.
- [PERSUSASION] You still need to finish – the displacer can hear you, can’t she? Kill her.
- [PERSUSASION] Exactly. Kill yourself, complete the contract, and you’ll be reborn in Avernus. Free.
If you have the persuasion requirements, this is undoubtedly the easiest way to kill him in the game.
Set up an ambush with Mage Hand or Minor Illusion
You can use Mage Hand or Minor Illusion to draw them out, then ambush them with AoE attacks. Make sure you have your best damage dealers for this.
How to save Yurgir in BG3

Alternatively, you can use the dialogue to steer Yurgir away from a fight entirely and opt to try to save him from his contract—though this does upset Astarion due to the deal you made with Raphael.
Begin by steering the conversation towards the pact with Raphael, then ask why he wanted the Dark Justiciars dead. An option can then be taken to persuade Yurgir to allow you to look for a way to save him from his contract by exploring. I had this option because I am a Ranger.
A large yellow circle will then appear on your map, highlighting where you can investigate to determine precisely what stops Yurgir’s contract from being fulfilled.
When speaking to the rats, you’ll discover they speak as one. Head to the coordinates X: -709 Y: -723, and you’ll find a book, One Becomes Many and a Broken Effigy. Interact with the Effigy, and a rat will spawn with a warning.
Attack the rat and kill it, which results in another dialogue scene before a swarm of rats attack. Each rat has very little health and can be killed on one hit, but many more will spawn. AOE attacks are significant as you can kill several in one go.
After the rats are defeated, a Dark Justiciar will appear. Kill him and take his loot, and you can return to Yurgir having successfully broken his contract and completed the quest—leaving you free to take the last orb you need.


